Wonton Soup: A Recipe for Beginners
Wonton Soup…so easy to make!
Have you ever made wonton soup or dumplings before? It is really easy and such a delicious family meal. Here is a very simple
beginners version for you to try. It so easy to adapt this recipe to your family’s taste. You can buy wonton wrappers in the supermarket, usually in the chilled section near the fresh pasta.
Ingredients
1 pack of wonton wrappers
200g of minced chicken or pork (Also try adding in some finely diced prawn meat)
1 small onion, finely diced
1/2 small carrot, grated finely
1/2 cup finely shredded cabbage
1 beaten egg
1 teaspoon minced garlic
Seasoning: optional. I like to use 1 Tablespoon of oyster sauce and 1 Teaspoon of Soy Sauce, but leave them plain if you prefer or add in whatever you like!
*note: we like to serve ours in a light vegetable broth/soup with some extra veges. Our toddler likes them plain, no soup!
Method:
1.Place all ingredients (except wonton wrappers) into a bowl and mix until well combined.

Lots of hidden vegetables!
2. Carefully separate some wonton wrappers, I like to do 10 at a time, spread them out in front of you on a flat surface (If the weather is hot, place the remaining wonton wrappers in the fridge)
3. Place approximately 1 and 1/2 teaspoons of mince mixture into the centre of each wonton wrapper. It doesn’t need to be rolled into a ball, just place in the centre. Don’t use too much, or they will explode!
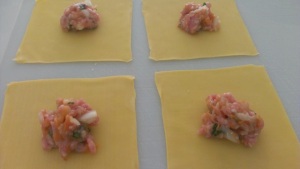
Place your mince mixture on the centre of each wonton wrapper
4. ‘Fold’ the wontons by ‘pinching’ the opposite corners together. Repeat on the other corners.
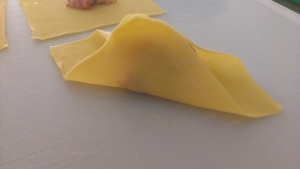
Fold and pinch the opposite corners. Repeat on the other side too.
5. Gently shape the wonton by squeezing the top, just above the mince with both hands, using your thumbs and pointer fingers. This will seal it too.
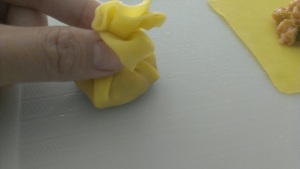
Pinch the wonton pastry together
6. Repeat this until all wonton wrappers have been used. I like to place mine onto some baking paper, they won’t stick then! You can put these in the fridge to cook later.
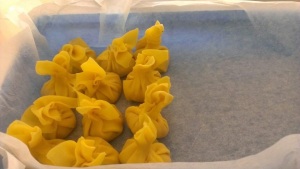
Baking paper will stop them sticking to your container.
7. You can steam them for 10 mins, or for something very easy, prepare a pot of boiling water. (You can prepare it as a broth using stock cubes or your own stock)
8. When the water is boiling add in your wontons. (Not too many at a time, depending on the size of your pot) You can also add in more veges to the broth, try bok choy, shredded cabbage, spring onions and diced carrot.

Make a simple broth using vegetable stock and shredded vegetables
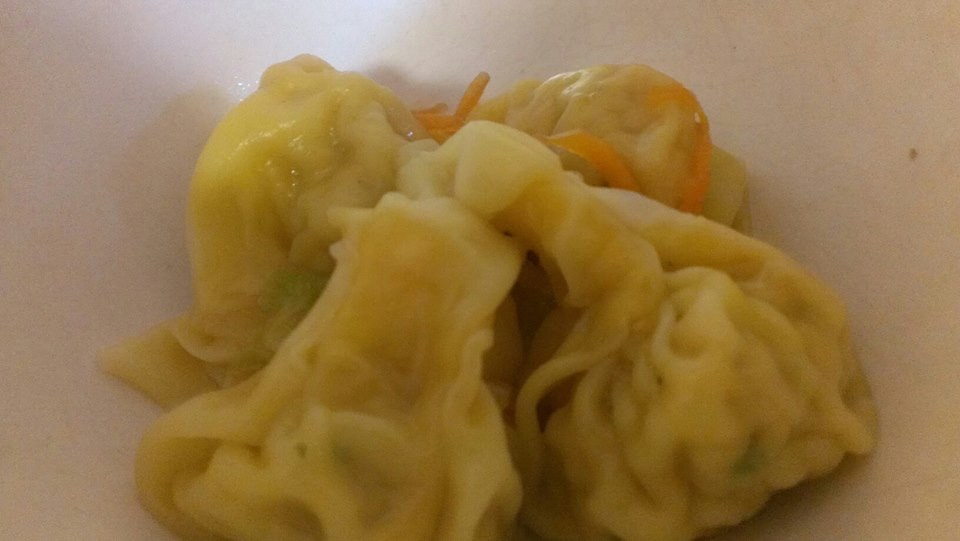
9. Wait for the wontons to float to the top of the broth and boil (uncovered) for another 3 minutes.
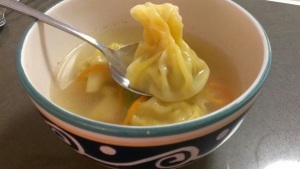
Serve the wontons with broth. My littlest one loves them just as they are, no soup.

Serve with or without a broth
There you go, I hope this inspires you to try these in the kitchen!